Firstly I have to apologise to you all for my absence over the past few weeks - things have been incredibly busy and it has meant I haven't even had time to paint my nails or review anything in my spare time. Have no fear though for we are back and back with a BOOM - braided nails!
I have seen these around in a few places, the naughty nails(!), and thought it was about time they made their way on to my nails!
The first thing I can say is make sure you have some spare time for these nails to take place...me thinking these would be a quick splish splash and in fact they turned out to take over an hour! This is for the simple fact that it is best to wait for the individual stripes to dry before painting the next colour on the braided nails. At first I didn't wait very long and the result was some smudged silly looking nails! Patience is the key with this design.
Right, now let's get down to bizzleness! Picking your colours. It is best to select a glitter, shimmer and a bright/bold colour. This way all the textures and effects complement each other - believe me, they will look delicious!
I chose Butter London - London Thames for my shimmer, £12 from Very for £12, Butter London - Macbeth for my bold colour available from the Butter London website at £13 and Ciaté - fit for a queen as my glitter polish. This polish came in my caviar nail bar available from the Ciaté website at £20 but is also available as a singular bottle from the Ciaté website at £9 a bottle.
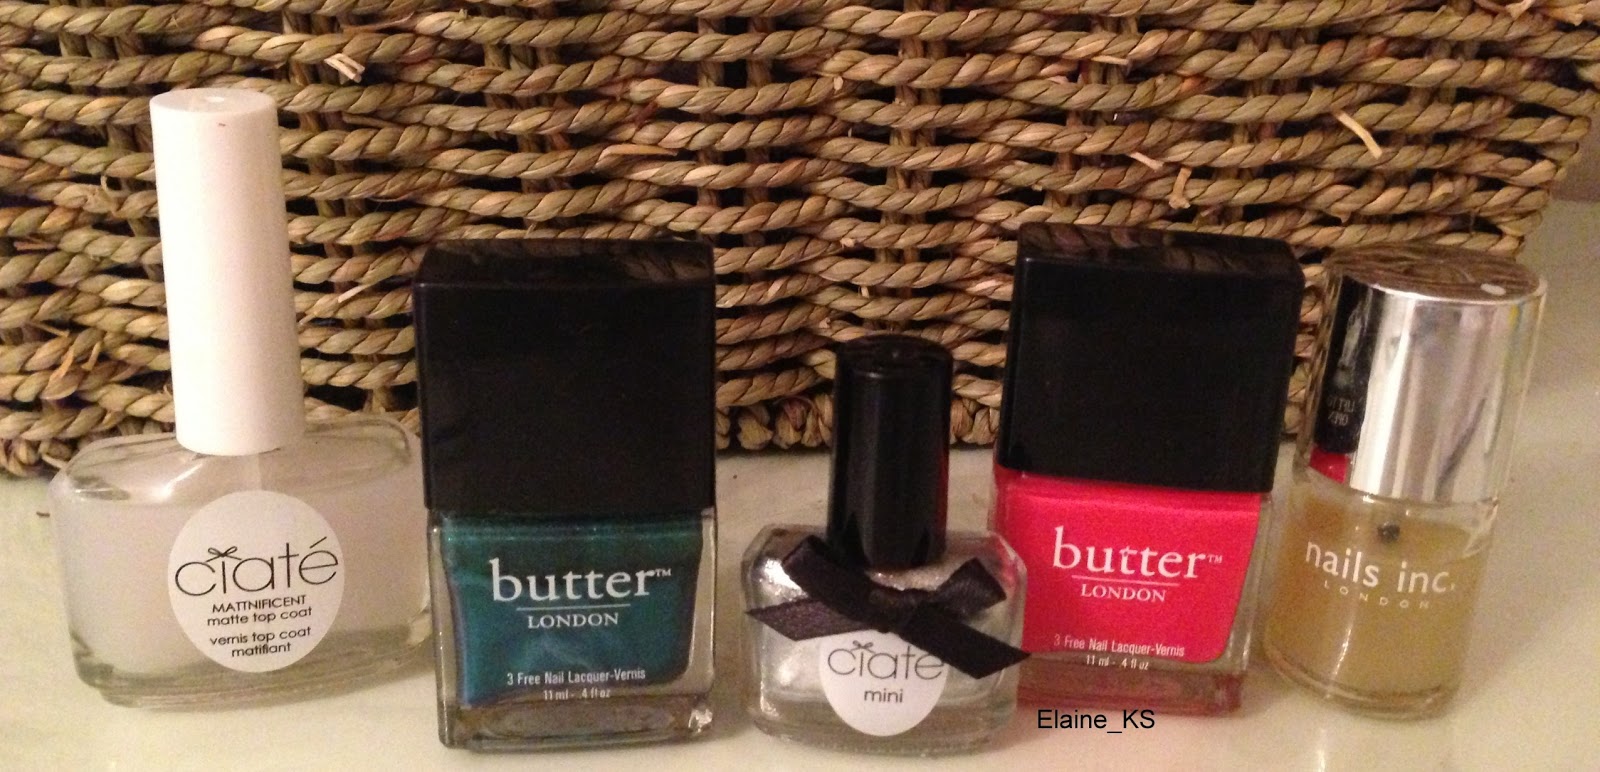
The two other varnishes seen in this image are my matte top coat by Ciaté, available from the Ciaté website for £11 and my chosen base coat - A&E base coat by Nails Inc, available for £12 from the Nails Inc website.
Butter London nail varnishes are becoming a fast favourite of mine alongside Ciaté. They provide an effortless and glamorous finish, last a good 5 days and manage to hold an incredible shine. Not only do they look insane but when removed your nailsit comes away on the cotton pad as easy as pie, get ready to be amazed! There's so scrubbing or scraping, just a simple glide and simples pimples natural nails ahoy!
Once you have selected your nail varnishes it is time for the magic to happen. I shall give a number point description as to how to create these nails, it shall be easier to explain than in rambly paragraphs!
You can paint all of your fingers in the braided look, however I just chose to do my thumbs and fourth fingers :).
1. Paint your nails with your base coat, this will help to prevent your nails from any stains whilst providing a smooth layer for your polish to set on.
2. Paint your chosen braided nails with two thin coats of your glitter polish. This will create the foundation for the braid as well as providing your first braided strand.

3. Using your shimmer polish create your first braid. Take the brush and wipe off any excess to ensure there are no blobs which will stick to your nail.
4. Hold the shimmer brush on the bottom left corner of your nail and rotate your nail to create a diagonal stripe and wait to dry. You might need to repeat this process to ensure the silver is completely covered.

5. Once dry take your bright/bold colour and ensure the brush isn't dripping in polish.
6. Place the brush on the bottom right hand side of your nail and rotate your finger. This should leave you with a cross image of shimmer, brightness and silver.

7. You may need to repeat the above step to ensure the bright/bold colour covers your green stripe where they overlap. Annnnnd wait to dry.
8. Once dry we begin to build up the braid even more. Take your silver brush and place it directly above where your shimmer stripe started.
9. Ensure there is no excess on the brush, place to your nail and rotate your finger.
10. You should now have a silver strip going across your bright/bold colour, directly above your shimmer polish.

11. If you need to repeat this process to ensure the bright/bold colour is covered, repeat and wait to dry.
12. As you can see from the image above, a) it is a different thumb as I got carried away with my left hand so switched to my right and b) there is plenty of polish around the nail. Don't panic, this is easily removed with a cotton bud dipped in nail varnish remover :).
13. Now we are on a roll! Take your shimmer polish, and create your next stripe directly above your previous bright/bold stripe.
14. All you need to do now is repeat this process until your nail is full of beautiful braids!
15. If you painted only some fingers with this braided effect use one of the contrasting colours from your braid to paint on the remaining nails. I chose my shimmer polish as I adore this green by Butter London.
16. As mentioned above, any varnish around the nail just dip a cotton bud in to some nail varnish remover and gently/carefully swipe it off :)

This is my completed left hand without any top coat, just with the polishes as they are - I was extremely happy with these as a first attempt if I do say so myself ...!
To complete my nail look I decided to apply a matte top coat rather than a shiny top coat but this is completely up to you and your personal preference.

I am in love with Mattnificent by Ciaté, your nails feel like silk and look irresistible with this top coat on! Simply apply one thin coat, sit back, relax and watch the transformation in to a complete set of stunning mattnificent nails!
Here we have it folks, the completed breakdown to achieve your very own braided nails.
Chin chin and let me see your finished results too :).
Here's to a wonderful week ahead of us,
Hugs,
Elaine_KS
xo
Hello Harija!
ReplyDeleteThank you for your sweet comment :). I shall definitely check out your blog!
I hope you have a lovely week :) xo